Friday, September 12, 2014

Minecraft Pickaxe Birthday Card.

I made this card by using my child's foam pickaxe from Minecraft.  I simply chose my colors to match and then punched out 3/4" square.  Then I arranged them and glued them down.  The saying was from a Minecraft t-shirt.  The Minecraft words are from the packaging that held the foam pickaxe.


With 3/4" squares this is a big card.  It's actually 8 1/2" X 5 1/2".  Hope you enjoy. - Heidi

Thursday, September 11, 2014

Background die love!

I am in love with background dies.  They make a quick and cool backgrounds for any card.  I saw a card that cut away part of the back ground and I thought I could definitely do that.  To see an example click here, it's the second card.  This card is similar as I cut away part of the background chevron die cut. The die is the Chevron Cutting Plate from Taylored Expressions. The sentiment is from All Holidays and the flowers are from Too Kind, both from Stampin' Up.


The next card uses the Cover Plate: Chevron Vertical Die from Papertrey Ink. I cut out several colors of cardstock with this die.  Then in the kraft colored background I placed the blue and pink stripes to fill in the background.  The sentiment is from Banner Greetings and the flower is from Fifth Avenue Floral both from Stampin' Up. The leaves are foliage dies from Spellbinders. The doily behind the flower is picot edge circles from Spellbinder.


Have a great day! - Heidi

Wednesday, September 10, 2014

Luigi Card

Happy Wednesday to you!  I have another recycle and I've seen that before card.  We recently bought this remote, see below, at our Goodwill store.  On the side panel is a picture of Luigi.


With such a nice picture on the side - I had to make it into something!


I used the Little Letter Thinlits Dies and Draw the Line stamp Set from Stampin Up.  I think it turned out pretty cool for a recycled card! - Heidi

Sunday, September 7, 2014

Two more sticker cards

I used the same vellum stickers from a previous post and made two different cards. The vellum stickers are called Beyond Postmarks, Sentiments, from K & Company.  The paper is from Fancy Pants and is called Wonderful Day. The first card uses the tag topper scalloped punch from Stampin' Up.


The second card uses the Circles Large Edger punch from EK Success and a heart punch.  The Circles punch is an edger punch and makes a chain of circles.  I simply punched the top of my tag and trimmed the extra circles I didn't want off the top.  I find that I have a lot of edger punches and I need to find different things to do with them.
Circles Large Edger Punch Product Photo
Have a wonderful Sunday - Heidi

Saturday, September 6, 2014

More vellum sticker cards

Here are three more cards that I made using the vellum stickers I talked about in my last post.


The above card uses a chevron background die from, I believe Papertrey Ink. The card below uses a background die from Taylored Expressions.


See the arches on the first and third card?  They are made with the Diamond Lace slim edger punch from EK Success.  I just punched one out and stuck it behind the sticker to give that cool arch look.  On the third card I drew the lines that radiate out.  The punch I speak of is pictured below.

EK Success Slim Edger Punch, Diamond Lace

Have a great rest of your Saturday. - Heidi

Saturday, August 30, 2014

One Sticker - Two Ways!

Recently when I was at Goodwill I saw this book of stickers for only 99 cents.  So of course I had to buy them and try to make cards from them.  I made a few cards, which I will share with you over the next few days, but then I got bored.  The stickers are from K & Company Beyond Postmarks, Sentiments vellum stickers.


This is what the sticker pad looks like.

I wanted the stickers to NOT look like stickers when I made them into cards.  For the first card I used gold and white sequins.  The color of these stickers matches Hello Honey from Stampin' Up exactly.


The second card uses yellow epoxy "bubble" stickers that my friend Karen gave to me.  They don't look much like stickers to me anymore.  I'd love to know what you think! - Heidi


Thursday, August 28, 2014

Shoe Collage from Club Scrap

Hello everybody!  I tried to post every day, but darn it all if life doesn't get in the way!  We were on vacation in the Wisconsin Dells for a couple of days and while I had things scheduled I didn't have enough to fill the gaps.  Oh well, I am here now!

I bought this stamp at Goodwill, surprise, surprise! It is soooo NOT me, but I love a good challenge!  Here is my attempt at a girly girl card:


Okay, so the shoe is kinda from the 90's and that dates the stamp a bit.  Although the stamp says 2004!? I embossed the background and glitter embossed the shoe and bow tie then cut them out and popped them up on the card front.  I tried silver and gold before deciding on the red.  I added a little red Stickles to the purse to pop out the purse closure.  Ah, I don't know - what do you think? 

I seem to be easily tried of stamps lately.  I bought this one, used it once and am ready to move on.  I'll probably put it on Amazon, Etsy or Craigslist to get rid of it.  Not my style, but I think I did it justice. - Heidi

Tuesday, August 26, 2014

Itty Bitty Baby 3 ways

At a recent trip to Goodwill I picked up a pack of these cute clothespins.  I made this first card in yellow without the words.  The space above the clothesline was empty, but it was too late to stamp on it.  I couldn't stamp on it because I had popped the cardstock up to make room for the clothespins.  The surface was uneven and the congratulations never would have come out evenly.  So I put in a Congrats die cut from Cuttlebug.  I thought it was cute.


Then enter my good friend Beth.  Her insight was that I should have made the card pink instead of yellow.  That would be because she has a granddaughter and another on the way (I am not sure if it is a boy or a girl).  I am NOT one to back down from a challenge!  Pink it is!


Ahh, there we have it in all of it's pink glory!  What about the boys, you may ask?  I am not one to leave a task undone.  The next one is for the boys.


The size of these cards is 4 1/2 X 7 1/2.  These cards are far too bulky to go in an envelope. I could make them whatever size I wanted because I don't need to make a matching envelope.  These cards are what I like to call "give me cards."  You can not put them in an envelope and you couldn't easily mail it so you must "give it" to the recipient.

The stamps used are Itty Bitty Baby and Sassy Salutations from Stampin' Up.  Have a fantastically creative day! - Heidi.

Monday, August 25, 2014

Corner Garden

I have seen examples of this technique on Pintrest and Splitcoaststampers.  The image is heat embossed with white powder and then you color on it with markers.  The first time I saw this the woman used Sharpie markers to color on the embossed areas.  It's rather difficult as the marker gets clogged up with bits of embossing gunk and you have to wipe it off now and again.


Not too bad, but I have to say that I don't think that I will make another card like it.  The sentiment is from A Round Array and is also embossed.  The flowers are a stamp called Flower Garden by Stampin' Up. Have a lovely day! - Heidi

Sunday, August 24, 2014

Graphic 45: December

Here we are at the end of the road with December. I can't say that I liked the embellishment for this month, but I used it anyway.


The sentiment is from Teeny Tiny Wishes from Stampin Up.  The paper is A Place in Time from Graphic 45.  Have a wonderful day - Heidi.

Saturday, August 23, 2014

Graphic 45: November

All of this Graphic 45 is starting to wear on me!  Two more, I promise!  I used the whole pad and just about all of them embellishments.  Here is the November card.


Kind of an interesting old tyme feel to it.  The sentiment is from banner greeting from Stampin' Up. Hope you enjoy - Heidi.

Friday, August 22, 2014

Graphic 45: October

Another Happy Morning to you!  Here is my card for October featuring the papers from the A Place in Time line from Graphic 45.  I didn't have any matching embellishments so I just embossed Happy Halloween on the front.


I think this my favorite of them all.  I wish I had a matching embellishment, but I don't think it turned out too bad.  Have a fantabulous day! - Heidi


Thursday, August 21, 2014

Graphic 45: September

Good morning to you!  Here is my September card using paper from the A Place in Time by Graphic 45.  I didn't know what sentiment to use so I just left it blank.


It could be a birthday or happy back-to-school card if you wanted, I guess.  Have a wonderful day - Heidi.

Wednesday, August 20, 2014

Graphic 45: August

Here is my card for the August Graphic 45 papers called A Place in Time.


Have a great night - Heidi

Tuesday, August 19, 2014

Graphic 45: July

Happy morning to you.  Here is my card for July from Graphic 45's line called A Place in Time.


The cardstock is Not Quite Navy and the stamp set is Banner Greeting. - Heidi

Monday, August 18, 2014

Graphic 45: June

Whew, I am a little late posting this today.  Here is my card for June using Graphic 45 papers called A Place in Time.


The embellishments are from Graphic 45 and the ribbon is an oldie but goodie from Stampin' Up. Have a great night - Heidi.

Sunday, August 17, 2014

Graphic 45: May

Here is the card I made using the May paper from Graphic 45's line called A Place in Time.


The sentiment is from A Muse art stamps.  Have a great Sunday - Heidi.

Saturday, August 16, 2014

Graphic 45: April

Here is my card for April using the Graphic 45 paper called A Place in Time.


The sentiment is from A Muse art stamps.  The flower is from Something to Say by Stampin' Up. Have a great day. - Heidi

Friday, August 15, 2014

Graphic 45 - March

I worked last night and I work tonight.  Right now I am functioning on 3 hours of sleep and I have a bunch of errands to do.  Oh well, I'll catch up on my sleep tomorrow.  For those of you that are just joining me I found this pad of Graphic 45 paper called A Place in Time.  There was a sheet for each month.  Today I am sharing my March card.


The base is Lavender Lace and the ribbon Perfect Plum.  The embellishment goes with the paper pack.  I decided not to put a sentiment on this card.  I think it is just fine as a blank card.
Have a great day - Heidi.

Thursday, August 14, 2014

Graphic 45 - February

My card for today features the Graphic 45 paper A Place in Time.  This is for the month of February.  The stamps I used were from the Banner Banter set from Stampin' Up.  The cardstock and ink colors are Bravo Burgundy and Pretty in Pink.


A little valentine card.  I hope you enjoy! - Heidi


Wednesday, August 13, 2014

Graphic 45 - January

Wow, have I really been gone that long?  It's not that I haven't been crafting, I guess, I just haven't been sharing.  I have a LOT of cards saved up and I am going to try and post everyday.

I found a 6 X 6 pad of Graphic 45 papers and matching embellishments on a trip to Goodwill. Heck, for 99 cents how could I pass it up?  I decided to make 12 cards - one for each month as the paper has the months on it.  Today I will share January.


This card measures 6 1/4" X 4 1/2".  That is NOT a normal size card, but with my envelope punch board I was able to make matching envelopes.  I love my envelope punch board (although the punch part gets stuck) as I can make any sized envelope I want.  The extra strip of paper from the front 6 X 6 size is inside along with a place to write a note.

The card bases is Not Quite Navy and the sentiment is from Teeny Tiny Wishes.

Hope you have a great night and I'll see you tomorrow. - Heidi

Thursday, May 15, 2014

A catch-up on cards post

I have three more cards to share with you tonight.  I seem to accumulate the pictures and post them all at once.  I should do one-a-day like most bloggers to keep you interested, but I can't seem to post every day.  Oh well, here they are!


The above card uses a Martha Stewart sticker that I purchased at Goodwill.  Why was it at Goodwill, you may ask?  Some of the pearls were missing from the cake so perhaps that was why.  If you look closely you will see that the pearls are a little different.  I "replaced" the missing pearls with some pearl-like glue.  If I hadn't pointed it out, you probably never would've noticed, right?  The banner is from Bountiful Banners by Papertrey Ink.


I love this card.  It uses the Chevron Cutting Plate from Taylored Expressions. I sponged an ombre assortment of colors on a shiny piece of photo paper and put it behind the cut out.  Then I fussed for about 20 minutes making that bow.  I hate fussing - I am very impatient.  I will probably never, ever make this bow again, but damn if doesn't look awesome!  I can never mail it so I have no idea what I am going to do with it!  For now it is sitting on my work table as a reminder of my awesomeness! :)


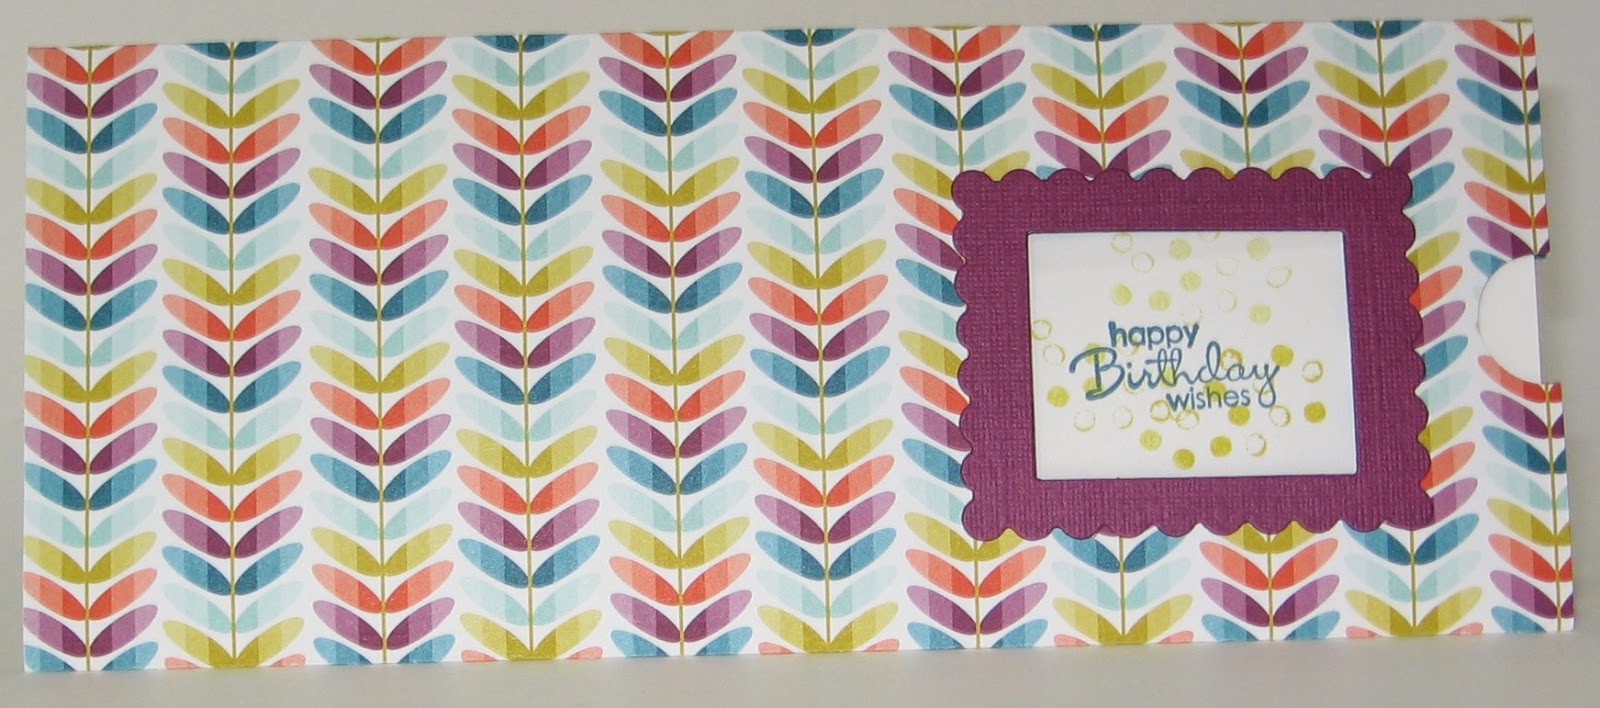
My last card uses the Swallowtail stamp from Stampin' Up. A while back I stamped this image on Tangerine Tango and embossed it in black.  I then took a paint brush dipped in bleach and water and "painted" on the cardstock to make lighter areas.  Sometimes you just have to paint with bleach to get the look you desire.  It came out beautifully, but I had no idea what to do with it.  Then I saw a card in a magazine that placed this butterfly in a square, with a stamped saying (not the one I used).  The light bulb went on and this swallowtail had a new home.  The saying is from Butterfly Dreams by Papertrey Ink. The other colors are Island Indigo and Black.  I actually used my diagonal scoring plate from Stampin' Up for the first time.  Needless to say there is a bit of a learning curve and this was NOT my first attempt at a criss-cross background.  A few pearls added where the diamonds intersect to give it a quilted look and here's what I made.  Hope you like - Heidi

Summer Silhouettes

I borrowed the set Summer Silhouettes from my friend Karen.  I was really wanting it bad, but after borrowing it now I am over it.  It is not a bad set. I have so many other stamp sets similar to it, and a LOT of other sets on my wish list, that this one is off my mind for now.


The above card uses Summer Silhouettes and Bountiful Banners (from Papertrey Ink).  It is a semi-CASE of this card from Pintrest.


The above card uses Summer Silhouettes and Thoughts and Prayers, both from Stampin' Up. This is also a semi-CASE from here. Have a great night. - Heidi

Work of Art: Sneak Peek

By now you have seen many examples of the new set Work of Art from Stampin' Up that will be in the new catalog come June 1, 2014. Here is my humble addition to all those sneak peek samples.


Not overly impressive, but certainly simple. - Heidi

Friday, May 2, 2014

Pink Fish, Yellow Fish, Green Fish

I wrote previously that I stumbled across some old Stampin' Up stamp sets at a local thrift store.  The other set that I bought at Value Village was a retired set called Fly Fishing.  I found very few examples on SplitCoast that I liked so I "borrowed" a concept from one of the cards.  That card is here.  After looking at it again I'd say my card is VERY different from hers. It's birthday and not graduation also.  Either way take a look at what I made.


I think that, for once, my idea turned out awesome! - Heidi

Up In the Air

While at my local thrift store I spotted two older Stampin' Up stamp sets.  The set I am showing you today is called Up In the Air.  There are two sets with this name on SplitCoast, but this one is the older set.  It features planes and a hot air balloon.  I paired it with a Papertrey set called Butterfly Dreams and you have the following cards.


This is a bad picture as the airplane is actually popped up on Stampin' Dimensionals.  It does look more impressive in real life.  Thanks for looking! - Heidi

Grands Spellbinders storage

I store my Nestabilities, Framelits and other metal dies on magnetic sheets in the Stampin' Up stamp/DVD cases.  I can not, however, fit my Grand Nestabilities dies into those cases. For the longest time I kept the dies in their packages, but then they were hidden and I couldn't see what I had.  I thought about hanging them, in their packages, on the wall.  This would take up a lot of wall space.  Then I saw that someone put magnetic sheets on her closet doors to store all of her MFT dies.  While I was at Goodwill I came across a new, but scratched dry erase board for $7.00.  This is significantly cheaper than the brand new one I bought previously.  I bought the dry erase board and added strips of magnetic sheet with sticky back that I purchased here. These sheets are heavier than normal and I love them as they cut nicely on my paper trimmer.  They are also what I use in the Stampin' Up DVD cases.  From what I have experienced they are also fairly cheap too.  I put the dry erase board and the magnetic sheets together and here is how I store my larger dies.


Sorry about the flash, but you get the idea.  I also store my Sizzix Flip-its dies on this board.  It hangs to the left of where I store my Big Shot so I can just reach up and grab what I need.  I also use it to put dies out of the way when I am using them.  This way they won't get lost in my paper mess.  There is a pipe in the way, but I can use the storage just fine. - Heidi

Thursday, May 1, 2014

Sporty Lego Girls

I found these Lego patches at Goodwill and thought that I might be able to use them for a card or two.  I used my scalloped tag topper punch and glued the girls to their own tag.  Then I lined the bottom of each tag with a row of Legos.  This idea was a mimic of the card that the patches came on and I thought it was a clever copy.  Just a fun quick group of cards for Lego/sport loving kids.


The sentiment is from a set by A Muse.  Hope you enjoy! - Heidi

Thursday, April 24, 2014

Slider Cards?

I got an ad in the mail from US Cellular for the new Samsung Galaxy S5.  The ad shows a phone on the front with the screen cut-out and you pull the inside paper through to change the screen's picture.  It was very cool so I thought I can do that!  Here, after much frustration, are the end results.  I may post directions later, please let me know if you are interested.


This is the view closed. Stamps used: Gorgeous Grunge, LOL from Hero Arts and some birthday sets from Papertrey Ink.


The view open. The "screen" changes.


Another try with brown embossing powder and shiny, girly paper. Not sure about this version. 
Above is closed and below is open.


An all Stampin' Up version.  This was tricky because I had to cut the window out twice and cut the frame by hand.  Very time consuming!


My last one closed and then open.  These fit nicely in a #10 envelope as they are 8 1/2" long.  Hope you like them. - Heidi